Pressure Canning Green Beans

As our gardens start to produce fresh vegetables, it’s time to think about food preservation. One of my favorites is canning green beans. It’s so easy to do, and there’s nothing better in the winter than grabbing a jar of green beans to cook for dinner.
This is Pressure Canning 101 for those who have never done this before. There are many ways to preserve green beans, including freezing, water bath canning, and canning in the oven. You can raw pack or hot pack beans. I believe pressure canning is the best method, and I use the raw pack method.
The first year can be expensive, as you will need to purchase a pressure cooker, quart jars, lid seals and rings, and other necessary items. And of course, your beans. Unless you grow them in your garden.

Items needed for Pressure Canning
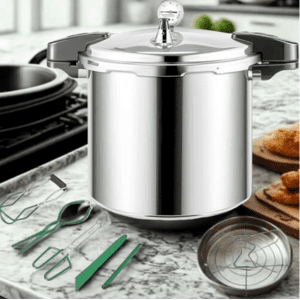
- Pressure Canner – There are many brands of canners, but you will choose between a weighted gauge canner or a dial gauge canner. Do your homework and purchase the one that will work for you. I recommend a 6-8 quart canner as a starting point. You can always upgrade to a larger size if you become more serious about canning a variety of foods. PRO TIP: If you’re unsure and don’t want to spend a lot of money, consider browsing Facebook Marketplace or your local flea markets and yard sales for a good used one.
- Large pot for boiling water
- Quart Jars – A bushel of half-runner beans will yield about 32 quarts.
- Seals and Rings
- Funnel, Jar Lifter, Lid Lifter, Bubble Tool; these can typically be purchased in a kit.
- Ladle
Preparing the beans
The first thing you want to do is string and snap your beans. Start with one end, pinching the tip and pulling in the direction the tip was pointing. This should pull the string from the bean. Do the opposite end the same way. Next, you will want to snap or break your beans into bite-size pieces. I prefer about an inch, but many people like them longer. You can cut them with a knife, but there’s something satisfying about hearing the snap as you break up the beans. Once you have finished breaking all the beans, dump them in a sink of cold water and give them a good rinse.
Let the canning begin!
- First, fill your large pot with water and place it on medium to low heat to warm it. Also, set up your canner by placing the rack at the bottom and adding the required amount of water (refer to the canner instructions). Turn the heat on low for the canner to start warming.
- Take your first jar and start putting the beans inside. Press them down tightly to fit as many as you can inside. Continue this step until all your jars are filled and no more beans are remaining.
- Using the bubble tool, run it down the inside of the jar between the glass and the beans, releasing as much air as possible.
- If you are choosing to season the beans, measure one teaspoon of salt and place it on top of each jar of beans. (1 teaspoon for a quart or 1/2 teaspoon for a pint)
- You are now ready to add the warm water. Using the ladle, add warm water to each jar, leaving an inch of headroom.
- Wipe down the rim well with a towel to remove any water or debris. This will ensure a tight seal. Place the sealing lid on top and then add the ring.
- Place the jars in the pressure canner. Close it up and set the weight or dial gauge according to the canner’s instructions. It is essential to know your altitude level to determine the appropriate amount of pressure to use. The instruction manual will have a guide for you to follow for this step. The beans should be canned for 20 minutes in pint jars or 25 minutes in quart jars at the correct pressure weight. Don’t start timing them until the gauge is at the proper pressure. Again, refer to your canner instructions to determine when the pressure has been reached so that you can start your timer.
Now it’s time to sit back and let the canner do the magic!
When the timer goes off, turn the heat off and remove the canner from the heat. Do NOT remove the pressure weight or lower the dial gauge. Let the canner decompress on its own. Once it has cooled down, open the canner and, using the jar lifter, remove the jars to a place where they can cool undisturbed for 24 hours.
Enjoy all year long!!